部署环境准备
| 主机名 | IP地址 |
|---|---|
| master01 | 100.100.137.220 |
| master02 | 100.100.137.221 |
| master03 | 100.100.137.222 |
| worker01 | 100.100.137.223 |
| worker02 | 100.100.137.224 |
主机配置
主机名配置
由于本次使用5台主机完成kubernetes集群部署,其中3台为master节点,名称为master01、master02、master03;其中2台为worker节点,名称分别为:worker01及worker02
hostnamectl set-hostname master01
hostnamectl set-hostname master02
hostnamectl set-hostname master03
hostnamectl set-hostname worker01
hostnamectl set-hostname worker02
主机名与IP地址解析
所有集群主机均需要进行配置。
cat /etc/hosts
100.100.137.220 master01
100.100.137.221 master02
100.100.137.222 master03
100.100.137.223 worker01
100.100.137.224 worker02
防火墙配置
所有主机均需要操作。
关闭现有防火墙firewalld
systemctl disable firewalld
systemctl stop firewalld
firewall-cmd --state
not running
SELINUX配置
所有主机均需要操作。修改SELinux配置需要重启操作系统。
setenforce 0
sed -ri 's/SELINUX=enforcing/SELINUX=disabled/' /etc/selinux/config
时间同步配置
所有主机均需要操作。最小化安装系统需要安装ntpdate软件。
yum install -y ntpdate
timedatectl set-timezone Asia/Shanghai
ntpdate ntp1.aliyun.com
crontab -l
0 */1 * * * /usr/sbin/ntpdate ntp1.aliyun.com
配置内核转发及网桥过滤
所有主机均需要操作。
添加网桥过滤及内核转发配置文件
cat /etc/sysctl.conf
net.bridge.bridge-nf-call-ip6tables = 1
net.bridge.bridge-nf-call-iptables = 1
net.ipv4.ip_forward = 1
vm.swappiness = 0

加载br_netfilter模块
modprobe br_netfilter

查看是否加载
lsmod | grep br_netfilter

加载网桥过滤及内核转发配置文件
sysctl -p /etc/sysctl.conf
安装ipset及ipvsadm
所有主机均需要操作。主要用于实现service转发。
安装ipset及ipvsadm
yum -y install ipset ipvsadm

添加需要加载的模块
cat > /etc/sysconfig/modules/ipvs.modules <<EOF
#!/bin/bash
modprobe -- ip_vs
modprobe -- ip_vs_rr
modprobe -- ip_vs_wrr
modprobe -- ip_vs_sh
modprobe -- nf_conntrack
EOF

授权、运行、检查是否加载
chmod 755 /etc/sysconfig/modules/ipvs.modules && bash /etc/sysconfig/modules/ipvs.modules && lsmod | grep -e ip_vs -e nf_conntrack
关闭SWAP分区
修改完成后需要重启操作系统,如不重启,可临时关闭,命令为swapoff -a
swapoff -a
安装Docker
所有集群主机均需操作。
wget https://mirrors.aliyun.com/docker-ce/linux/centos/docker-ce.repo -O /etc/yum.repos.d/docker-ce.repo
yum -y install --setopt=obsoletes=0 docker-ce-20.10.12-3.el7
systemctl enable docker ; systemctl start docker

在/etc/docker/daemon.json添加如下内容
修改cgroup方式
cat /etc/docker/daemon.json
{
        "exec-opts": ["native.cgroupdriver=systemd"]
}

systemctl restart docker
安装kubeadm,kubelet,kubectl
cat >  /etc/yum.repos.d/k8s.repo << EOF
[kubernetes]
name=Kubernetes
baseurl=https://mirrors.aliyun.com/kubernetes/yum/repos/kubernetes-el7-x86_64/
enabled=1
gpgcheck=1
repo_gpgcheck=1
gpgkey=https://mirrors.aliyun.com/kubernetes/yum/doc/yum-key.gpg https://mirrors.aliyun.com/kubernetes/yum/doc/rpm-package-key.gpg
EOF

安装指定版本
yum -y install --setopt=obsoletes=0 kubeadm-1.23.9-0  kubelet-1.23.9-0 kubectl-1.23.9-0

为了实现docker使用的cgroupdriver与kubelet使用的cgroup的一致性,建议修改如下文件内容。
vim /etc/sysconfig/kubelet
KUBELET_EXTRA_ARGS="--cgroup-driver=systemd"

设置kubelet为开机自启动即可,由于没有生成配置文件,集群初始化后自动启动
systemctl enable kubelet
HAProxy及Keepalived部署
HAProxy及keepalived安装
我们安装在master01和master02机器上,两台机器都安装
yum -y install haproxy keepalived
HAProxy配置及启动
两台机器都配置
cat /etc/haproxy/haproxy.cfg
#---------------------------------------------------------------------
# Example configuration for a possible web application. See the
# full configuration options online.
#
#
#---------------------------------------------------------------------
#---------------------------------------------------------------------
# Global settings
#---------------------------------------------------------------------
global
maxconn 2000
ulimit-n 16384
log 127.0.0.1 local0 err
stats timeout 30s
defaults
log global
mode http
option httplog
timeout connect 5000
timeout client 50000
timeout server 50000
timeout http-request 15s
timeout http-keep-alive 15s
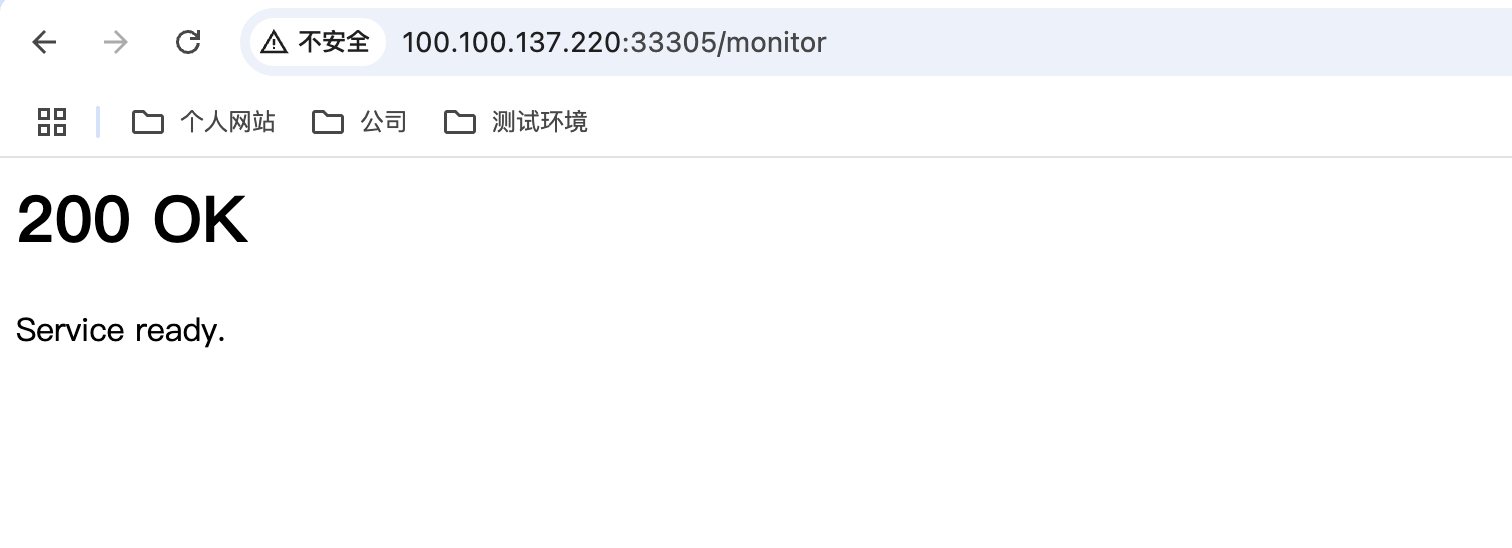
frontend monitor-in
bind *:33305
mode http
option httplog
monitor-uri /monitor
frontend k8s-master
bind 0.0.0.0:16443
bind 127.0.0.1:16443
mode tcp
option tcplog
tcp-request inspect-delay 5s
default_backend k8s-master
backend k8s-master
mode tcp
option tcplog
option tcp-check
balance roundrobin
default-server inter 10s downinter 5s rise 2 fall 2 slowstart 60s maxconn 250 maxqueue 256 weight 100
server master01 100.100.137.220:6443 check
server master02 100.100.137.221:6443 check
server master03 100.100.137.222:6443 check
systemctl enable haproxy;systemctl start haproxy
systemctl status haproxy
Keepalived配置及启动
主节点(master01):
cat /etc/keepalived/keepalived.conf
! Configuration File for keepalived
global_defs {
    router_id LVS_DEVEL
script_user root
    enable_script_security
}
vrrp_script chk_apiserver {
    script "/etc/keepalived/check_apiserver.sh" #此脚本需要多独定义,并要调用。
    interval 5
    weight -5
    fall 2
rise 1
}
vrrp_instance VI_1 {
    state MASTER
    interface ens192 # 修改为正在使用的网卡
    mcast_src_ip 100.100.137.220 #为本master主机对应的IP地址
    virtual_router_id 51
    priority 101
    advert_int 2
    authentication {
        auth_type PASS
        auth_pass abc123
    }
    virtual_ipaddress {
        100.100.137.225 #为VIP地址
    }
    track_script {
       chk_apiserver # 执行上面检查apiserver脚本
    }
}


cat /etc/keepalived/check_apiserver.sh
#!/bin/bash

err=0
for k in $(seq 1 3)
do
    check_code=$(pgrep haproxy)
    if [[ $check_code == "" ]]; then
        err=$(expr $err + 1)
        sleep 1
        continue
    else
        err=0
        break
    fi
done

if [[ $err != "0" ]]; then
    echo "systemctl stop keepalived"
    /usr/bin/systemctl stop keepalived
    exit 1
else
    exit 0
fi

chmod +x /etc/keepalived/check_apiserver.sh
备节点(master02):
cat /etc/keepalived/keepalived.conf
! Configuration File for keepalived
global_defs {
    router_id LVS_DEVEL
script_user root
    enable_script_security
}
vrrp_script chk_apiserver {
    script "/etc/keepalived/check_apiserver.sh" #此脚本需要多独定义,并要调用。
    interval 5
    weight -5
    fall 2
rise 1
}
vrrp_instance VI_1 {
    state BACKUP
    interface ens192 # 修改为正在使用的网卡
    mcast_src_ip 100.100.137.221
    virtual_router_id 51
    priority 99 # 修改为99
    advert_int 2
    authentication {
        auth_type PASS
        auth_pass abc123
    }
    virtual_ipaddress {
        100.100.137.225  #为VIP地址
    }
    track_script {
       chk_apiserver # 执行上面检查apiserver脚本
    }
}

cat /etc/keepalived/check_apiserver.sh
#!/bin/bash

err=0
for k in $(seq 1 3)
do
    check_code=$(pgrep haproxy)
    if [[ $check_code == "" ]]; then
        err=$(expr $err + 1)
        sleep 1
        continue
    else
        err=0
        break
    fi
done

if [[ $err != "0" ]]; then
    echo "systemctl stop keepalived"
    /usr/bin/systemctl stop keepalived
    exit 1
else
    exit 0
fi

chmod +x /etc/keepalived/check_apiserver.sh
启动:
systemctl enable keepalived;systemctl start keepalived

可以看到已经有虚拟IP存在:
ip -br a
lo               UNKNOWN        127.0.0.1/8 ::1/128
ens192           UP             100.100.137.220/24 100.100.137.225/32 fe80::64d5:7c7f:aed6:304e/64
docker0          DOWN           172.17.0.1/16
kubernetes 1.23.9 集群部署
集群镜像准备
可使用VPN实现下载。
kubeadm config images list --kubernetes-version=v1.23.9
k8s.gcr.io/kube-apiserver:v1.23.9
k8s.gcr.io/kube-controller-manager:v1.23.9
k8s.gcr.io/kube-scheduler:v1.23.9
k8s.gcr.io/kube-proxy:v1.23.9
k8s.gcr.io/pause:3.6
k8s.gcr.io/etcd:3.5.1-0
k8s.gcr.io/coredns/coredns:v1.8.6
集群初始化
kubeadm init --kubernetes-version=1.23.9 --apiserver-advertise-address=100.100.137.220   --control-plane-endpoint="100.100.137.225:16443"  --upload-certs   --service-cidr=10.96.0.0/12  --pod-network-cidr=10.244.0.0/16
[init] Using Kubernetes version: v1.23.9
[preflight] Running pre-flight checks
[preflight] Pulling images required for setting up a Kubernetes cluster
[preflight] This might take a minute or two, depending on the speed of your internet connection
[preflight] You can also perform this action in beforehand using 'kubeadm config images pull'
[certs] Using certificateDir folder "/etc/kubernetes/pki"
[certs] Generating "ca" certificate and key
[certs] Generating "apiserver" certificate and key
[certs] apiserver serving cert is signed for DNS names [kubernetes kubernetes.default kubernetes.default.svc kubernetes.default.svc.cluster.local master01] and IPs [10.96.0.1 100.100.137.220 100.100.137.225]
[certs] Generating "apiserver-kubelet-client" certificate and key
[certs] Generating "front-proxy-ca" certificate and key
[certs] Generating "front-proxy-client" certificate and key
[certs] Generating "etcd/ca" certificate and key
[certs] Generating "etcd/server" certificate and key
[certs] etcd/server serving cert is signed for DNS names [localhost master01] and IPs [100.100.137.220 127.0.0.1 ::1]
[certs] Generating "etcd/peer" certificate and key
[certs] etcd/peer serving cert is signed for DNS names [localhost master01] and IPs [100.100.137.220 127.0.0.1 ::1]
[certs] Generating "etcd/healthcheck-client" certificate and key
[certs] Generating "apiserver-etcd-client" certificate and key
[certs] Generating "sa" key and public key
[kubeconfig] Using kubeconfig folder "/etc/kubernetes"
[endpoint] WARNING: port specified in controlPlaneEndpoint overrides bindPort in the controlplane address
[kubeconfig] Writing "admin.conf" kubeconfig file
[endpoint] WARNING: port specified in controlPlaneEndpoint overrides bindPort in the controlplane address
[kubeconfig] Writing "kubelet.conf" kubeconfig file
[endpoint] WARNING: port specified in controlPlaneEndpoint overrides bindPort in the controlplane address
[kubeconfig] Writing "controller-manager.conf" kubeconfig file
[endpoint] WARNING: port specified in controlPlaneEndpoint overrides bindPort in the controlplane address
[kubeconfig] Writing "scheduler.conf" kubeconfig file
[kubelet-start] Writing kubelet environment file with flags to file "/var/lib/kubelet/kubeadm-flags.env"
[kubelet-start] Writing kubelet configuration to file "/var/lib/kubelet/config.yaml"
[kubelet-start] Starting the kubelet
[control-plane] Using manifest folder "/etc/kubernetes/manifests"
[control-plane] Creating static Pod manifest for "kube-apiserver"
[control-plane] Creating static Pod manifest for "kube-controller-manager"
[control-plane] Creating static Pod manifest for "kube-scheduler"
[etcd] Creating static Pod manifest for local etcd in "/etc/kubernetes/manifests"
[wait-control-plane] Waiting for the kubelet to boot up the control plane as static Pods from directory "/etc/kubernetes/manifests". This can take up to 4m0s
[apiclient] All control plane components are healthy after 20.083436 seconds
[upload-config] Storing the configuration used in ConfigMap "kubeadm-config" in the "kube-system" Namespace
[kubelet] Creating a ConfigMap "kubelet-config-1.23" in namespace kube-system with the configuration for the kubelets in the cluster
NOTE: The "kubelet-config-1.23" naming of the kubelet ConfigMap is deprecated. Once the UnversionedKubeletConfigMap feature gate graduates to Beta the default name will become just "kubelet-config". Kubeadm upgrade will handle this transition transparently.
[upload-certs] Storing the certificates in Secret "kubeadm-certs" in the "kube-system" Namespace
[upload-certs] Using certificate key:
1b81c9ee02c7499db501225a984935ab6855e25673ec5b6ca8a00a34247eddaa
[mark-control-plane] Marking the node master01 as control-plane by adding the labels: [node-role.kubernetes.io/master(deprecated) node-role.kubernetes.io/control-plane node.kubernetes.io/exclude-from-external-load-balancers]
[mark-control-plane] Marking the node master01 as control-plane by adding the taints [node-role.kubernetes.io/master:NoSchedule]
[bootstrap-token] Using token: pwrsdl.qoypmrt9j1g161my
[bootstrap-token] Configuring bootstrap tokens, cluster-info ConfigMap, RBAC Roles
[bootstrap-token] configured RBAC rules to allow Node Bootstrap tokens to get nodes
[bootstrap-token] configured RBAC rules to allow Node Bootstrap tokens to post CSRs in order for nodes to get long term certificate credentials
[bootstrap-token] configured RBAC rules to allow the csrapprover controller automatically approve CSRs from a Node Bootstrap Token
[bootstrap-token] configured RBAC rules to allow certificate rotation for all node client certificates in the cluster
[bootstrap-token] Creating the "cluster-info" ConfigMap in the "kube-public" namespace
[kubelet-finalize] Updating "/etc/kubernetes/kubelet.conf" to point to a rotatable kubelet client certificate and key
[addons] Applied essential addon: CoreDNS
[endpoint] WARNING: port specified in controlPlaneEndpoint overrides bindPort in the controlplane address
[addons] Applied essential addon: kube-proxy

Your Kubernetes control-plane has initialized successfully!

To start using your cluster, you need to run the following as a regular user:

  mkdir -p $HOME/.kube
  sudo cp -i /etc/kubernetes/admin.conf $HOME/.kube/config
  sudo chown $(id -u):$(id -g) $HOME/.kube/config

Alternatively, if you are the root user, you can run:

  export KUBECONFIG=/etc/kubernetes/admin.conf

You should now deploy a pod network to the cluster.
Run "kubectl apply -f [podnetwork].yaml" with one of the options listed at:
  https://kubernetes.io/docs/concepts/cluster-administration/addons/

You can now join any number of the control-plane node running the following command on each as root:

  kubeadm join 100.100.137.225:16443 --token pwrsdl.qoypmrt9j1g161my \
    --discovery-token-ca-cert-hash sha256:5f3c3526cd769abebaff66af9a6b899c224a41ac8488ad794d40a9b328c1c86e \
    --control-plane --certificate-key 1b81c9ee02c7499db501225a984935ab6855e25673ec5b6ca8a00a34247eddaa

Please note that the certificate-key gives access to cluster sensitive data, keep it secret!
As a safeguard, uploaded-certs will be deleted in two hours; If necessary, you can use
"kubeadm init phase upload-certs --upload-certs" to reload certs afterward.

Then you can join any number of worker nodes by running the following on each as root:

kubeadm join 100.100.137.225:16443 --token pwrsdl.qoypmrt9j1g161my \
    --discovery-token-ca-cert-hash sha256:5f3c3526cd769abebaff66af9a6b899c224a41ac8488ad794d40a9b328c1c86e
集群应用客户端管理集群文件准备
mkdir -p $HOME/.kube
sudo cp -i /etc/kubernetes/admin.conf $HOME/.kube/config
sudo chown $(id -u):$(id -g) $HOME/.kube/config
集群网络安装
使用calico部署集群网络
安装参考网址:https://projectcalico.docs.tigera.io/about/about-calico
wget https://docs.tigera.io/archive/v3.22/manifests/calico.yaml
vim calico.yaml
...
- name: CALICO_IPV4POOL_CIDR
  value: "10.244.0.0/16"
...
kubectl apply -f calico.yaml
其它Master节点加入集群
kubeadm join 100.100.137.225:16443 --token pwrsdl.qoypmrt9j1g161my --discovery-token-ca-cert-hash sha256:5f3c3526cd769abebaff66af9a6b899c224a41ac8488ad794d40a9b328c1c86e --control-plane --certificate-key 1b81c9ee02c7499db501225a984935ab6855e25673ec5b6ca8a00a34247eddaa
工作节点加入集群
kubeadm join 100.100.137.225:16443 --token pwrsdl.qoypmrt9j1g161my \
    --discovery-token-ca-cert-hash sha256:5f3c3526cd769abebaff66af9a6b899c224a41ac8488ad794d40a9b328c1c86e
验证集群可用性
查看所有的节点
[root@master01 ~]# kubectl get nodes
NAME       STATUS   ROLES                  AGE     VERSION
master01   Ready    control-plane,master   13m     v1.21.0
master02   Ready    control-plane,master   2m25s   v1.21.0
master03   Ready    control-plane,master   87s     v1.21.0
worker01   Ready    <none>                 3m13s   v1.21.0
worker02   Ready    <none>                 2m50s   v1.21.0

kubectl get pods -n kube-system
NAME                                       READY   STATUS    RESTARTS        AGE
calico-kube-controllers-5bb5d4f7f4-lhjpb   1/1     Running   0               8m22s
calico-node-28wdm                          1/1     Running   0               8m22s
calico-node-4j5h4                          1/1     Running   0               2m2s
calico-node-9k6ln                          1/1     Running   0               3m22s
calico-node-rq8zr                          1/1     Running   0               4m16s
calico-node-xbcsj                          1/1     Running   0               118s
coredns-64897985d-g6t8b                    1/1     Running   0               15m
coredns-64897985d-jmhmr                    1/1     Running   0               15m
etcd-master01                              1/1     Running   0               15m
etcd-master02                              1/1     Running   0               4m12s
etcd-master03                              1/1     Running   0               3m11s
kube-apiserver-master01                    1/1     Running   0               15m
kube-apiserver-master02                    1/1     Running   0               4m15s
kube-apiserver-master03                    1/1     Running   1 (3m33s ago)   2m59s
kube-controller-manager-master01           1/1     Running   1 (4m2s ago)    15m
kube-controller-manager-master02           1/1     Running   0               4m15s
kube-controller-manager-master03           1/1     Running   0               2m13s
kube-proxy-24vwd                           1/1     Running   0               118s
kube-proxy-6tfbp                           1/1     Running   0               3m22s
kube-proxy-b6wtn                           1/1     Running   0               2m2s
kube-proxy-bddck                           1/1     Running   0               4m16s
kube-proxy-l84xk                           1/1     Running   0               15m
kube-scheduler-master01                    1/1     Running   1 (4m2s ago)    15m
kube-scheduler-master02                    1/1     Running   0               4m15s
kube-scheduler-master03                    1/1     Running   0               2m19s